Sunday, May 29, 2016

Embrace Your Art, Week 19

The Embrace Your Art Daily week 19's prompt was "your best feature." The challenge was to use a sponge. Here is my page:


I had to ask my husband what he thought my best feature was. Once we decided we thought it should be personality instead of physical, we both agreed it's my silliness that makes me stand out. Of course sometimes this isn't always a good thing.

I started my page with just a cover of a dark slate blue:


I sponge painted it with a lighter pearlescent blue:


After it was covered with this sponge painting, I wanted to zap it with some spray inks through a stencil. However when I tried this I had a bit of an issue with the nozzle of my homemade glimmer mist. This is what turned out. I still thought it turned out cool tho:


I semi- watered down some pink paint and made a rectangle. I wanted the blue to show a bit behind it:


I decided to make what was supposed to be some kind of flower. I painted it with a Martha Stewart light yellow and added flat back pearls to the tips:


I wrote my words around the focal point of my page and decided it was done.


Products I used:

Saturday, May 28, 2016

Butterfly In Flight Tag

I decided I wanted to learn some new techniques. So I searched the Internet for some fun tutorials I thought I could handle.

So for the last couple days I have attempted one. The tutorial I followed came from the website Paxton Valley Folk Art


I didn't have all the materials she had (yet), so I improvised with what I had. Here in my interpretation:


Here is the original by Deb Paxton:


First I made the butterflies. In the tutorial, Deb used a die to cut the butterfly. I didn't have a die like that, so I used a punch I had and painted them black.


I made a background for the butterflies by tracing the cut punch:


For the black butterflies, I embossed them with some holographic embossing powder. Love the way it turned out.


Now for the tag, I started by smushing some distress inks around:


Deb used some distress markers through a stencil. I didn't have any of those, so I used some gelatos rubbed in by my finger:


There was lattice in the background of the original tag. So I had my handy dandy cricut cut some out:


I colored it with brown distress ink:


I attached it to my tag:


I stamped a smile stamp and embossed it with both a pearl powder and a white powder with a little white glitter sprinkled on while still wet. I ended up choosing the white:


I put it all together and my tag is done!


Again, if you'd like to see the original tutorial go here

Products that I used:


Tuesday, May 24, 2016

Gothic Arch Atcs

I recently made a series of Gothic arch atcs. I've started swapping a bit more and at times get addicted to making atcs. Let me show you!


This one was made with a crayon resist background. You can see a tutorial for it in my tutorial page. I used a plastic mesh that I got at the dollar store. I added a few fun embellishments and I outlined the quote with sparkly blue hot glue gun glue.


This one I especially like. I did a background using a stencil and spray inks. I added some glitter ribbon, a few fun embellishments and a quote.


This one has a scraped paint background. I used some rhinestone ribbon. I also cut little squares out of scrapbook paper to adorn the side.


And thats all I've got for today. I'm hoping soon I'll get to another background tutorial.

Monday, May 16, 2016

Some Springtime ATCs


I've made some springtime ATCs for a couple of swaps on Swapbot. I had to hurry. I'm having surgery on Wednesday and recovery I hear is going to be painful, so I don't want to owe anything I won't be able to do (though I'm not 100% I can promise that 😁)

Here's the first atc I made:


The background is embossed card stock painted metallic orange. I added a couple different kinds of lace and a few more embellishments.


This butterfly atc has a fun background. I ripped up pieces of card stock and glued them to another piece of card stock. Once dry, I sprayed it with shimmer/glimmer mists. The border at the top I cut out with my cricut. And I stamped the letters to spell out "spring".


This last atc was made with a watercolored paper towel as the background. I used another cricut cut border, plus some German scrap and flowers.


I hope my partners for these swaps enjoy them!


Sunday, May 15, 2016

Tissue and Pastel Background Tutorial

Heres another background tutorial for you all. I call it just tissue with pastels. Its a fun one when you're looking for some texture.

Tissue and Pastel Background Tutorial


Here's how you make it:

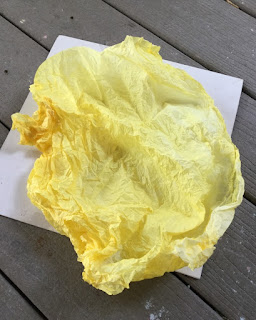
First, get your tissue paper and crumple it up:

Tissue and Pastel Background Tutorial


Then you uncrumple it and make sure it will spread across your card stock:

Tissue and Pastel Background Tutorial


Now spread or paint mod podge all over your card stock:

Tissue and Pastel Background Tutorial

Now stick your tissue over your mod podged card stock, making sure there are still folds and the tissue does not lay flat:

Tissue and Pastel Background Tutorial


Now repaint the whole thing with another coat of mod podge:

Tissue and Pastel Background Tutorial

Tissue and Pastel Background Tutorial


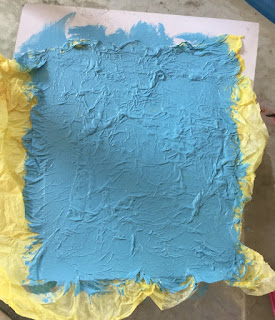
You could leave your background with the color of the tissue but I wanted mine blue, so I painted it with blue craft paint:

Tissue and Pastel Background Tutorial

Tissue and Pastel Background Tutorial

Until it was all covered:
Tissue and Pastel Background Tutorial


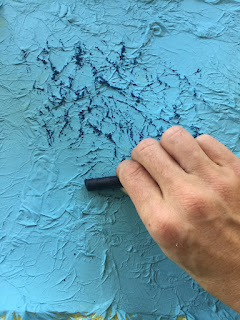
Now you get your pastels out. Take the wrapper off if there is one, and start rubbing it length wise across your tissue:

Tissue and Pastel Background Tutorial


Till its all been pasteled:
Tissue and Pastel Background Tutorial


Next I sprayed the whole thing with a matte sealant spray:

Tissue and Pastel Background Tutorial


Now all you have to do is cut off the extra tissue on the side and viola!


Saturday, May 7, 2016

2016 Art Journals Week 2

I still need to upload some older posts on this new blogger site, so I'll tell you I've been participating in some weekly art journal prompt challenges. Here I have week 17.


The first one I'm going to show you is for Embrace Your Art. The prompt was "what you're addicted to". And the challenge was to use crayons.


I think I'm addicted to loving my fam more than I am addicted to love, per say.

Anyway, I decided to use water color crayons because they're more fun I think.


I also hand drew my words. I do this by typing them into a font program and copying it.


My other journal page is for Color Me Positive. They're challenge was for us to use a hand made stamp, however I completely spaced doing that while making my page. Oh well. 

I used some other fun stuff.

I used rub ons:


And I also used black glitter hot glue gun glue for around the middle heart:


I had a fun time making these and so far and I'm only a couple of weeks behind.

heart art journals

Friday, May 6, 2016

An Art Diary

So here I am writing my first official blogger post. I transferred most of my old posts from a wix site to here. Why, you ask? I
Well I figured if I ever needed to stop blogging for awhile, I wouldn't be in jeopardy of losing my blog like I might with my domain name.

So on we go down a new road where I plan to change things up a bit from where I ended at myartjam.com.

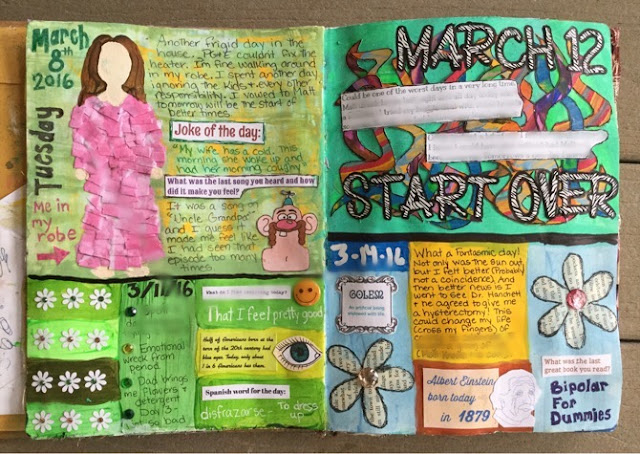
I would now like to introduce you to my art diary. I'm very proud of it. I'll take you through some of the first few pages:


As you can see in this first page, I split each page in two so each spread has four dates. I really went for the color blocking but still tried to make each day it's own.


I also used photographs printed from my zip printer to capture the memories of the day. I tried using different elements and techniques.


I love this third page for the depiction of myself in my robe. I folded pink papers over to give it some cool dimension. I also had fun making March 12th. All the squiggly lines behind were painted papers.


This last one might be my favorite so far. On the right side I made tip ins (where there are mini pages you can fold out. Under them are questions for the day and horoscope readings.

I like to use a variety of information about each day. Some of these are:
🔹word of the day
🔹quote of the day
🔹the day's headlines
🔹my horoscope
🔹question of the day
🔹this day in history
🔹joke of the day

I hope you have enjoyed checking out bits and pieces of my personal and art life. I'd super appreciate any comments or questions.