Wednesday, September 21, 2016

My Buddha Tags

It's been awhile since I've blogged. It had even been awhile since I even looked at this blog. But that's the beauty of blogger. You can go away for awhile and know it will still be there.

Today I want to show you some tags I've made recently. My husband and I have started practicing Buddhism. And so it has really influenced my work.

Here they are:

Buddha altered tag


Buddha altered tag

 For those of you who aren't familiar with Buddhism I'd like to suggest that you google it. It really is an amazing religion and way to live your life. It is accepting of everybody, even those with other faiths. It teaches peace and compassion. If you are at all interested, HERE is a five minute introduction to Buddhism.
Anyway, most Buddhists would never push their religion on anybody but would most likely gladly share any information you might want to know.
And so enough about Buddhism, I hope you all enjoyed my tags.😜

Saturday, June 25, 2016

Mail Art

I have been really busy with school. I am just finishing up my first clas, Creative Presentation. I made a pretty cool prezi video. Anyway, I have had little time to do much art. I had to drop out from the design teams I was on and am trying to fit non school related creativity when I can. This week I finished up a little early and decided to make some art for a few swaps and art journals.  Here is my latest page from my art diary: 
I also just finished up an altered envelope:
And here's the back:  
  And last but not least for this post, I wanted to show you a little digital fun I had the other day:
It's so much fun what you can do with an iPad.    

Tuesday, June 14, 2016

Color Me Positive, Week 20

I am quite a bit behind at this point, but I'm still whacking away at it. Here is week 20 of the Color Me Positive art journal challenge.
Now for the Color Me Positive challenges, there is an art challenge (in this case, create bubbles on your page). There is also a quote that goes along with it. Well I completely forgot to add the quote. Oh well. Here's the quote:
 

Wednesday, June 8, 2016

Top Cup Award

I entered an atc at the Sunday Stamps Challenge Blog. They were having a color challenge and this is my entry:


And I'm happy to announce I recieved their Top Cup award!


New Art Diary Pages

Here is my newest page in my art diary (kind of a lame name for it, but that's what it is).
Theres 2 days on a page. I know it can be a bit difficult to tell.

I don't know if you also noticed, but the most recent date is March 31st. I keep a record of my days and such in my iPad and then refer back to it when I want to make a new spread. I've got a lot of catching up to do!


Color Challenge for Use Your Stuff

I've always loved to make ATCs so I made these ATCs for the challenge blog Use Your Stuff. This weeks challenge was actually my choice. I also have always loved color challenges so thats what I chose to do.

Here are the colors I chose:


And here are my ACTs:


Sunday, June 5, 2016

Color Me Positive, Week 19

I'm only a few weeks behind on both Color Me Positive and Embrace Your Art art journal challenges. I'm afraid that lag will only increase. Why? 

I have started an intense degree program in graphic arts at Full Sail University. I am sooo excited. I hope this new adventure leads to some great and interesting work so I can further help support my family.

And who knows, perhaps this blog will go from  mixed media tutorials to awesome graphic printables  and my own store. I'd love it if you all wished me good luck.


Anyway, the Color Me Positives challenge for week 19 was to use a feather. Here is my page:


I started by painting my page a light blue color:


I painted square and rectangle shapes with a darker shade of blue making a sort of puzzle with the shapes:


I loosely outlined the shapes with a brown alcohol marker:


And then I loosely made a line in white between the shapes using a chalk marker:


I had my cricut cut a feather shape and painted it brown:


I glued on my quote:


I outlined my words with gold glue gun glue:


I attached a dark gold metal corner piece to my page. To keep my color balance, I added black glitter glue to my gold outline to darken it a little:


I also ended up adding a few streaks of the glittered gold glue to my feather and then I was done:


Products used:

Wednesday, June 1, 2016

"Vacation" for Crafters Cafe

This projects was done for the challenge blog "The Crafters Cafe." The theme for this week is vacation. (Boy, wouldn't I love to go on one, but I just started graphic design school!)

The digi image I used for this project comes from Lacy Sunshine. I believe the image is called "gone fishing."

I recently bought myself 10 or 12 Kraft binders in various sizes to fill up with artistic planners and art journaling. I filled one up with weeks 1-18 of the Color Me Positive art journaling challenge. But the binder itself looked dull. 


So I decided for this Crafters Cafe project, I'd decorate the back inside cover:

altered binder


I started by coloring the digi image of the girl with Prisma colored pencils:

lacy sunshine


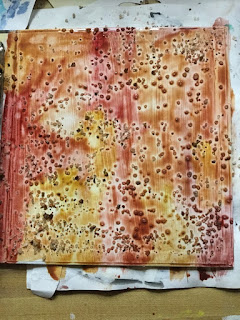
I did the background using wet watercolor  and rock salt:

rock salt background


I painted a little pond scene using craft paints:

rock salt background


I cut out some leafy shapes with my cricut and painted them to match the scene:


cricut cuts


I attached my girl using "scrap dots" by Helmar adhesives. It gives demension to your project without using those foamy stickers:

lacy sunshine


I grabbed some chipboard letters and gave them a coat of gesso:

chipboard letters


I painted them a pearlescent blue and attached them to my page:


chipboard letters


And now my art binder looks a little more filled in and artsy:


binder art journal


Products I used:

Sunday, May 29, 2016

Embrace Your Art, Week 19

The Embrace Your Art Daily week 19's prompt was "your best feature." The challenge was to use a sponge. Here is my page:


I had to ask my husband what he thought my best feature was. Once we decided we thought it should be personality instead of physical, we both agreed it's my silliness that makes me stand out. Of course sometimes this isn't always a good thing.

I started my page with just a cover of a dark slate blue:


I sponge painted it with a lighter pearlescent blue:


After it was covered with this sponge painting, I wanted to zap it with some spray inks through a stencil. However when I tried this I had a bit of an issue with the nozzle of my homemade glimmer mist. This is what turned out. I still thought it turned out cool tho:


I semi- watered down some pink paint and made a rectangle. I wanted the blue to show a bit behind it:


I decided to make what was supposed to be some kind of flower. I painted it with a Martha Stewart light yellow and added flat back pearls to the tips:


I wrote my words around the focal point of my page and decided it was done.


Products I used:


Saturday, May 28, 2016

Butterfly In Flight Tag

I decided I wanted to learn some new techniques. So I searched the Internet for some fun tutorials I thought I could handle.

So for the last couple days I have attempted one. The tutorial I followed came from the website Paxton Valley Folk Art


I didn't have all the materials she had (yet), so I improvised with what I had. Here in my interpretation:


Here is the original by Deb Paxton:


First I made the butterflies. In the tutorial, Deb used a die to cut the butterfly. I didn't have a die like that, so I used a punch I had and painted them black.


I made a background for the butterflies by tracing the cut punch:


For the black butterflies, I embossed them with some holographic embossing powder. Love the way it turned out.


Now for the tag, I started by smushing some distress inks around:


Deb used some distress markers through a stencil. I didn't have any of those, so I used some gelatos rubbed in by my finger:


There was lattice in the background of the original tag. So I had my handy dandy cricut cut some out:


I colored it with brown distress ink:


I attached it to my tag:


I stamped a smile stamp and embossed it with both a pearl powder and a white powder with a little white glitter sprinkled on while still wet. I ended up choosing the white:


I put it all together and my tag is done!


Again, if you'd like to see the original tutorial go here

Products that I used: